Lightroom 6 Facial Recognition Tutorial - Part 1
With the launch of the latest version of Adobe Lightroom 6 there is a new keyword feature called 'People Keywords'. These are keywords that are specifically designated to people, and are tied in with the new facial recognition features. Not only do People Keywords act as standard keywords, but they also act as pointers to an actual person, and to the region on the photograph that a person appears. As with most things, a bit of organisation is recommended before you dive straight into identifying everyone in your catalog of photographs. This tutorial explains what you need to know.
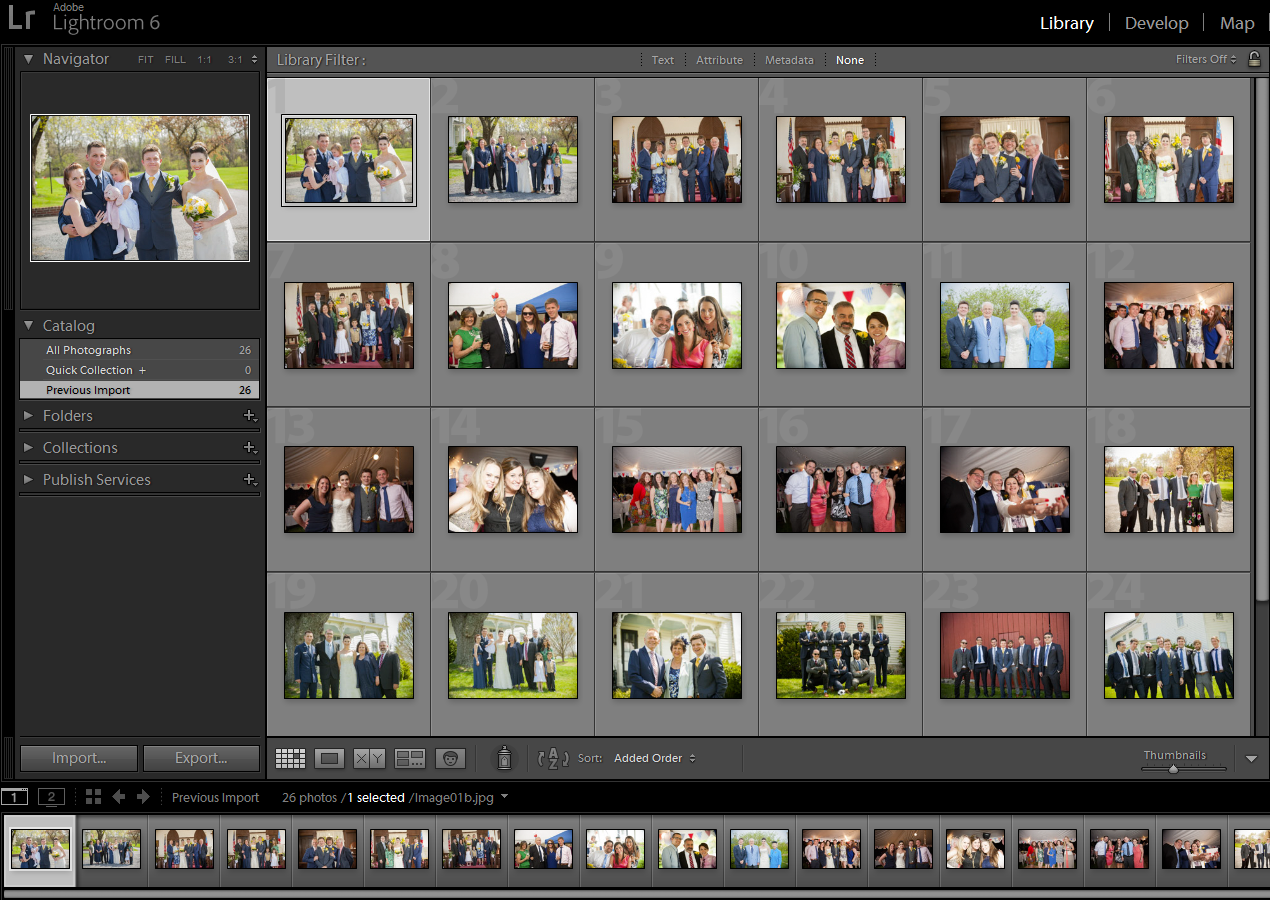
Importing Photos to Lightroom 6
To use the new features, we need to have some photos imported into Lightroom. If you are familiar with this, skip to the next section.
- Start Lightroom, and select the Library Module. Click the Import button at the bottom-left of the screen, or click 'File > Import Photos & Video', or press Ctrl+Shift+I. Your drives and folders are shown on the left of the screen.
- Navigate to the wanted folder and click it. The photos in the folder will be shown. Check the ones that you want to import. If you need to import multiple folders, hold down Ctrl (Windows) / Cmd (Mac) while clicking on them, or hold down Shift while clicking on the first and last folder in a series of consecutive folders.
- Choose whether to leave the photos where they are, or copy/move them to a new location, by selecting from Add, Move, Copy, or Copy as DNG at the top of the Import panel.
- Press Import and Lightroom will import the selected photos to the catalog.
Using Facial Recognition in Lightroom 6
- In the Library module, switch to the People view by clicking 'View > People' or by pressing 'O', or by clicking the 'Face' icon on the toolbar.
- Lightroom then prompts you to find faces in your catalog. Click one of the following options:
- 'Start Finding Faces In Entire Catalog' - Enables background face indexing. Lightroom detects faces in all photos in your catalog. (Full indexing may take a while.)
- 'Only Find Faces As Needed' - Leaves background face indexing disabled. Detects faces only in folders and collections when selected.
- If you chose to find faces in the entire catalog, you must wait for the indexing to complete, though you can continue to work as Lightroom does the indexing. Lightroom uses facial characteristics to find the different faces, and then groups the images of similar faces together. Once the initial indexing is complete, face indexing continues to run in the background. Faces in any images added later to the catalog are automatically detected, and Lightroom may also come up with new faces in images that it has already indexed.
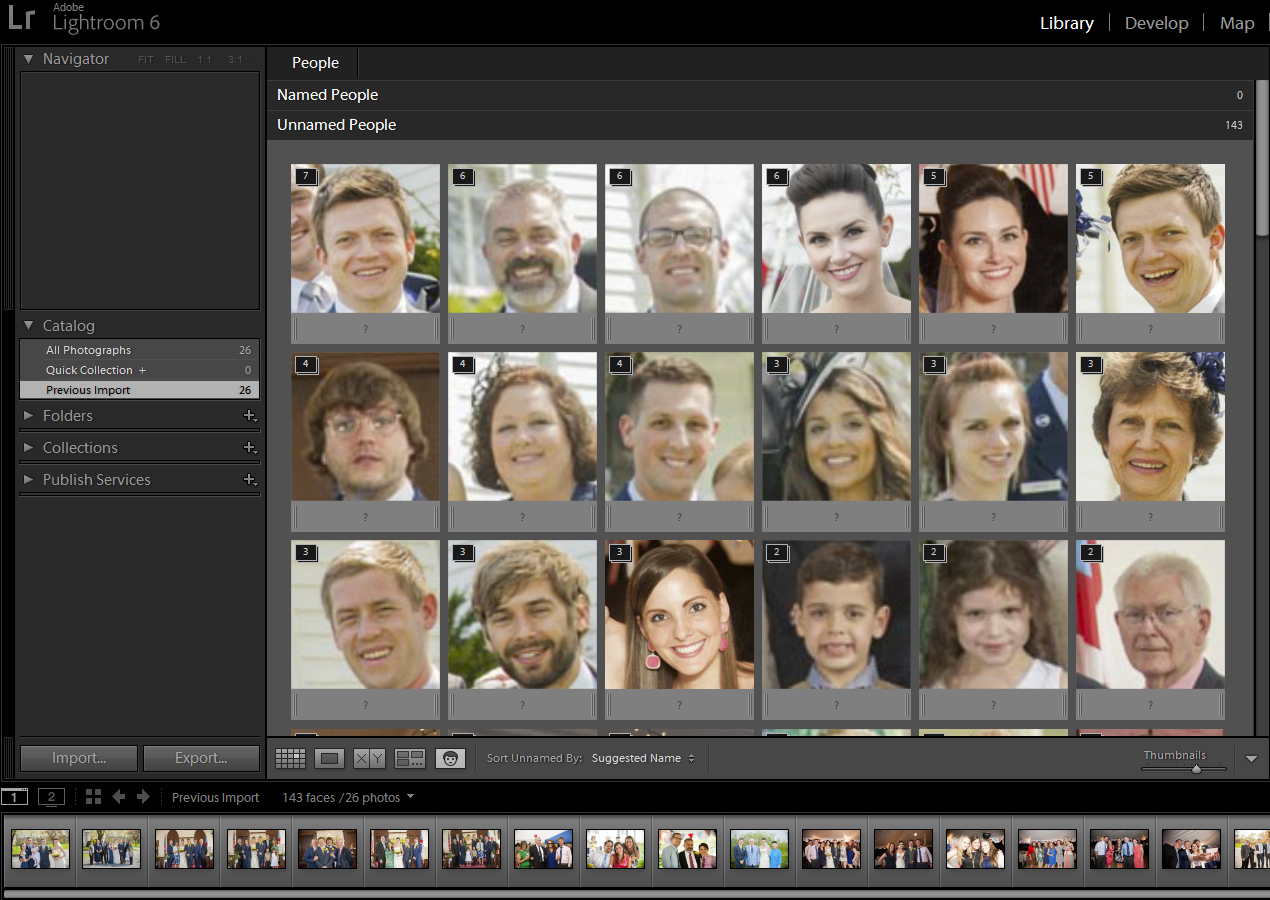
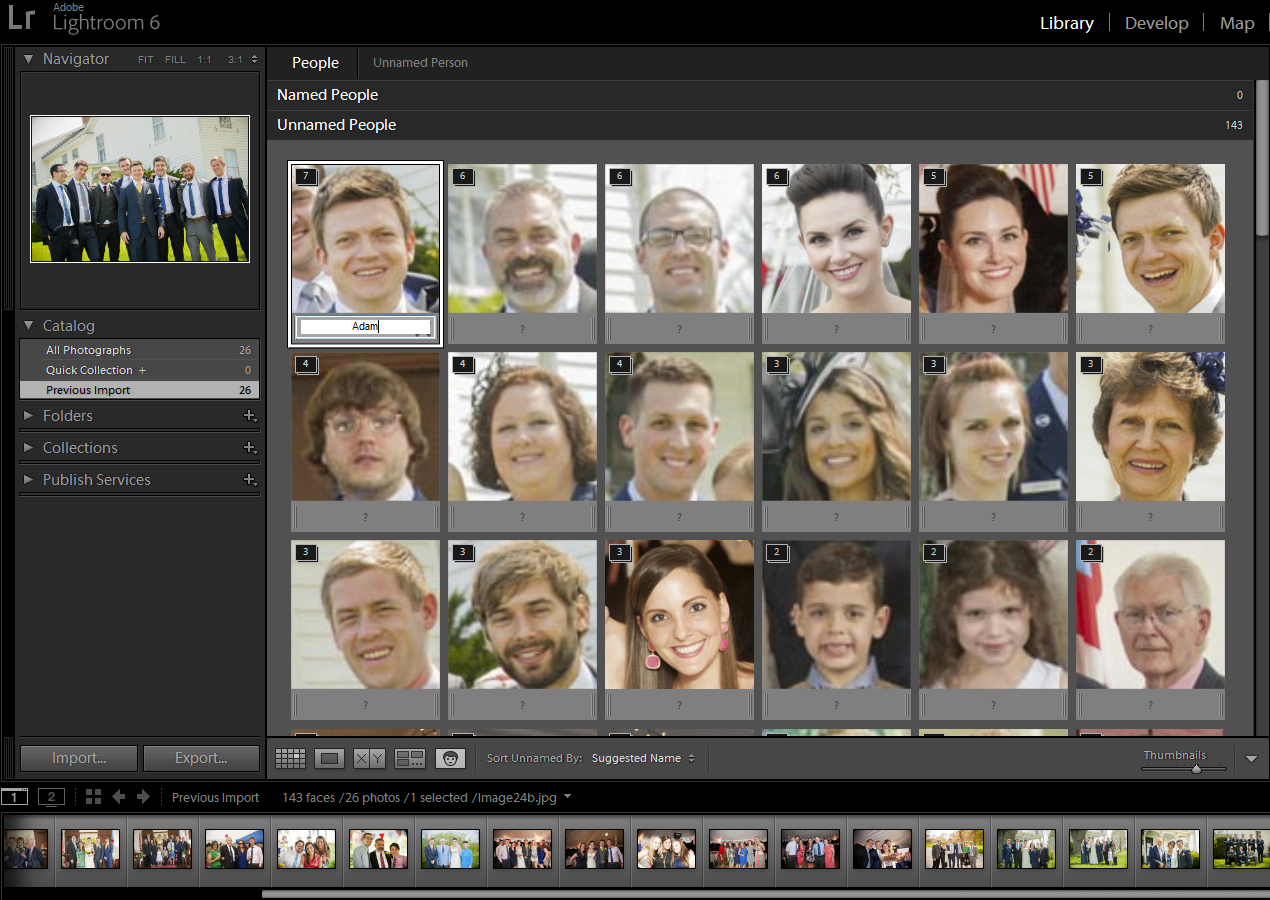
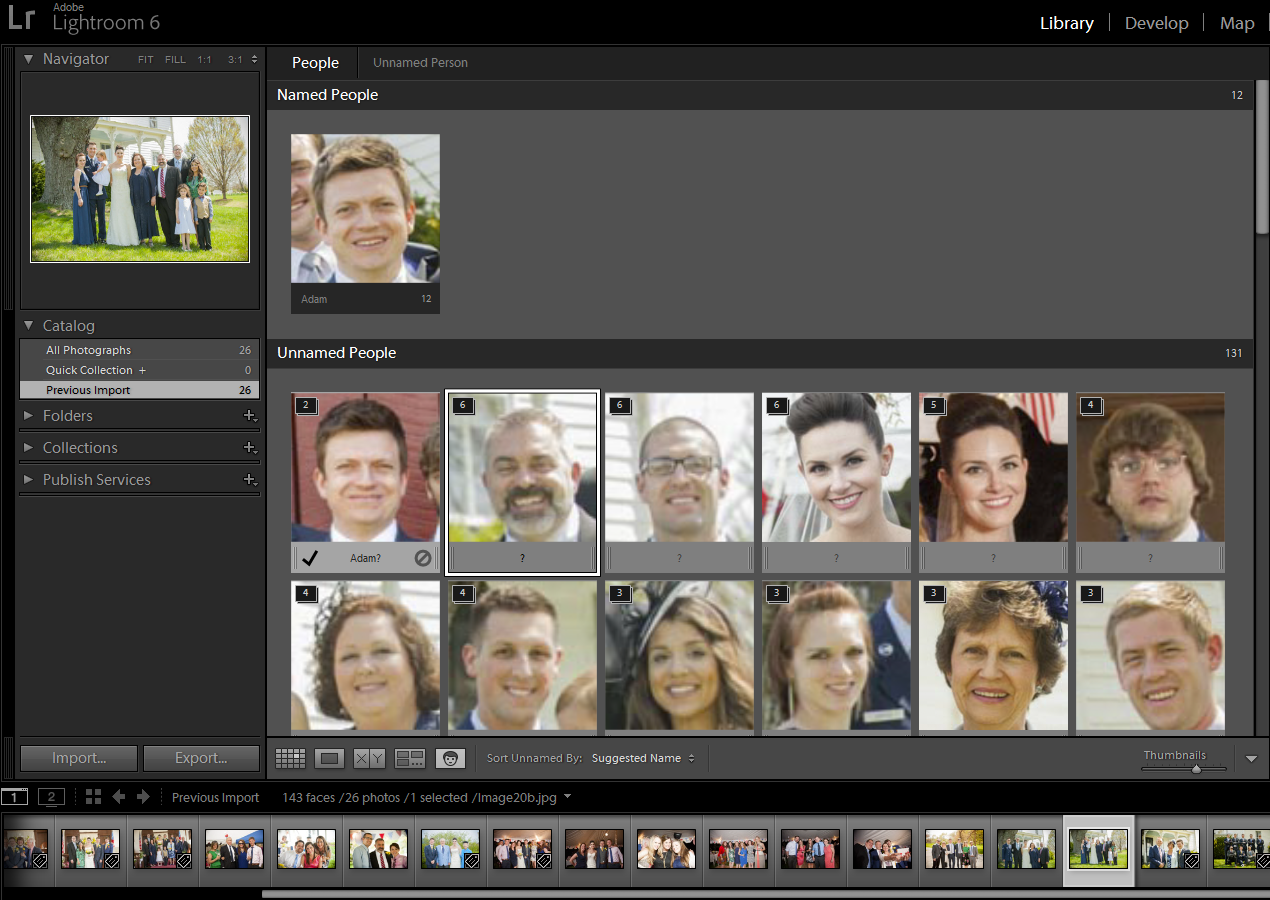
When tagging has completed, we are shown the faces that Lightroom has discovered. In the screenshot above, we see that 143 'Unnamed People' are listed: this means that it has found 143 heads, though many might be of the same person. It qualifies this by showing the initial number of supposed instances of a person next to each headshot: on the first line: 7, 6, 6, etc. Some photos obviously (to a human!) show the same person (see shots 1 and 6, or 4 and 5). To straighten things out, type a name beneath each photo in the Unnamed People area. All photos in the stack are automatically tagged with that name.
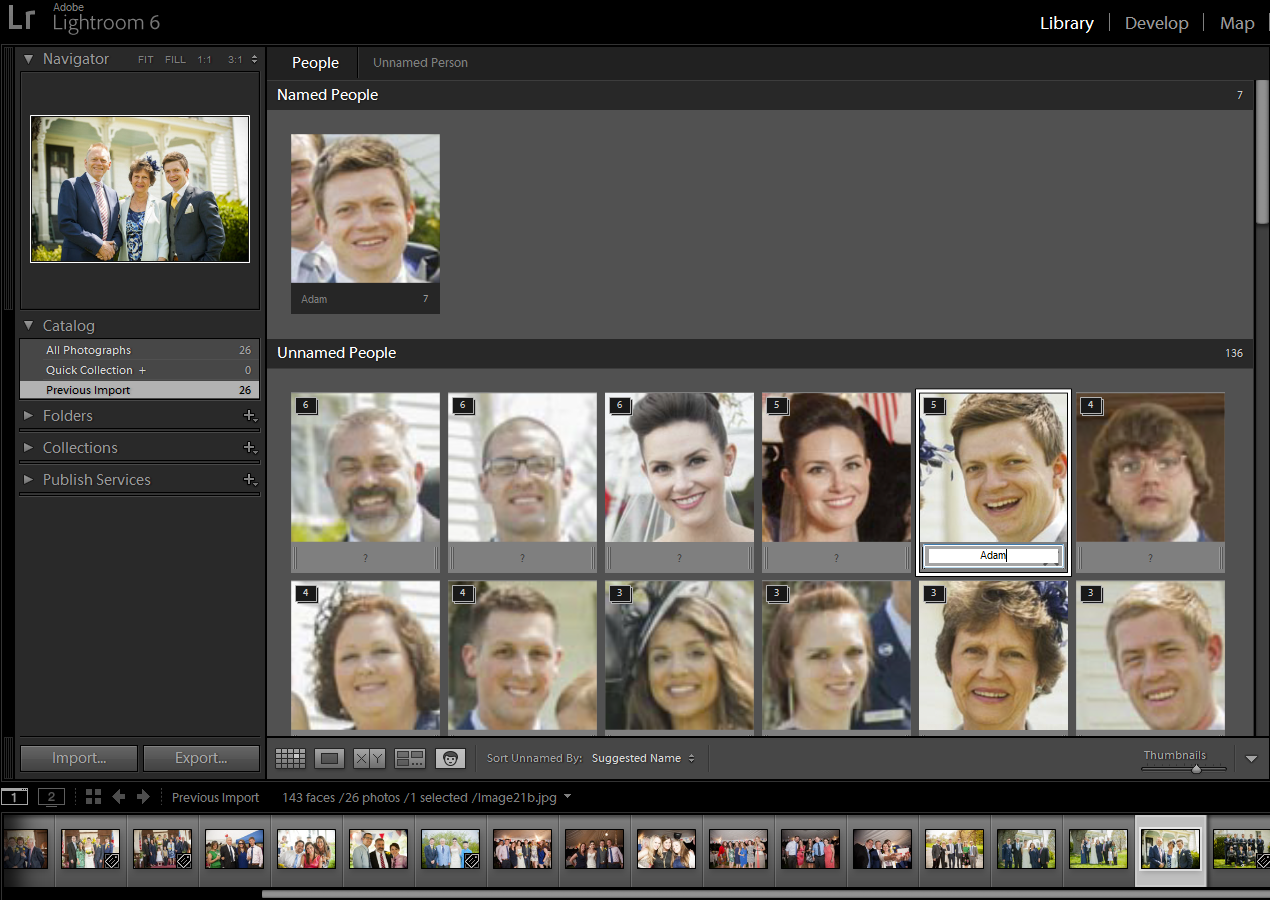
As you tag images, Lightroom moves them from the Unnamed People area in the People view to the Named People area, and adds these names to your keyword list as 'People keywords'.
If we add the same name to a second photo, Lightroom add the definition to the first use of the name, and increases the total for that name.
Here we can see that the person in the original photos 1 & 6, with 5 and 7 images connected to him, have been combined to record 'Adam' as having 12 images now connected to him, and the total 'Unnamed People' count reduced to 131. We can also see that Lightroom is making additional guesses on similar images: the first remaining Unnamed Person has the word 'Adam?' underneath him. Click the check-mark and Adam's total is again increased. When you click on a headshot to identify it, the photo that the headshot was found in is shown in the top-left of the panel.
Click to visit Part Two of this tutorial.
Note: the names used for the people in the photos in this article are imaginary.


